Menu Template:
Hover Popup Menu Rounded Toolbar Light Blue


Separate Menu Items Dreamweaver
This menu is generated by Dreamweaver Menu Extension.
Create your own menu now!

This menu is generated by Dreamweaver Menu Extension.
Create your own menu now!


To install the menu into your html page you should do the following things:
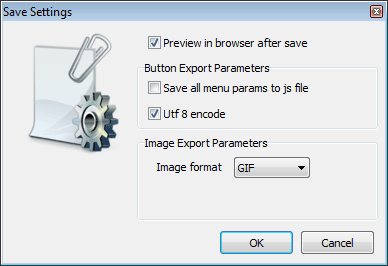
Create and save your buttons in any temp folder using Vista Buttons application. It will be better to export all menu code to external .js file. Go to "Tools/Export options...". Check "Save all menu params to js file" option.
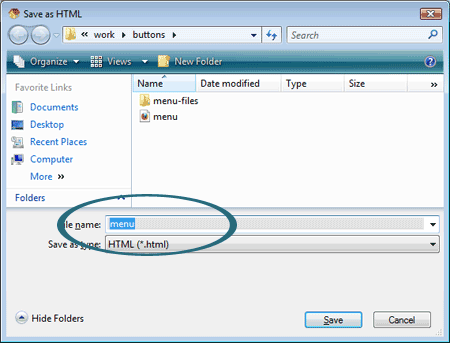
You can use "Save as HTML" function.
You can enter any name you like, for example enter "menu":
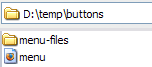
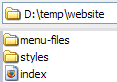
So you'll have menu.html file and "menu-files" folder with all menu files.
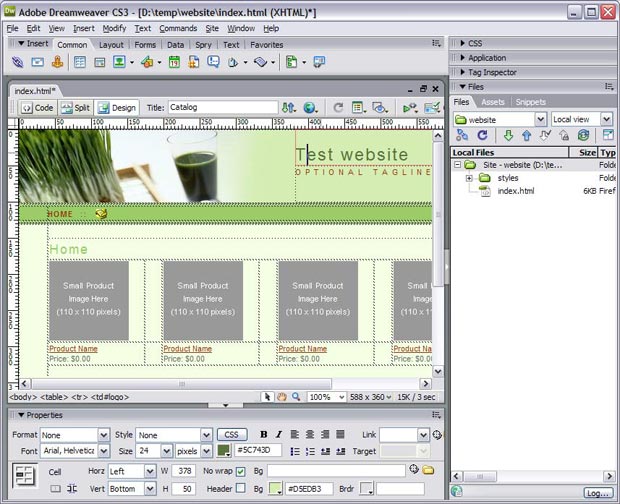
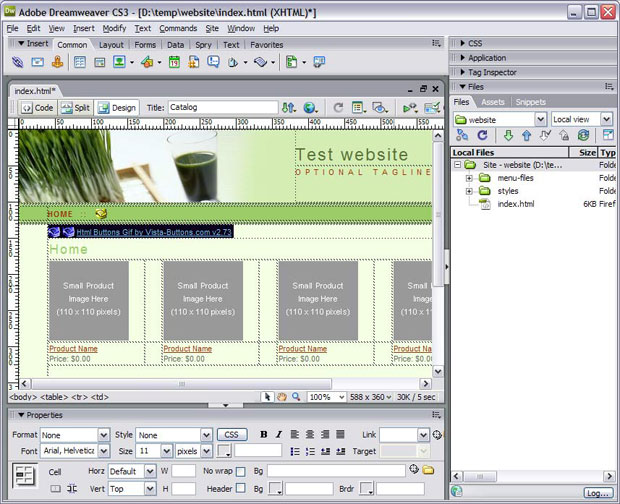
- Start Dreamweaver and open the web page that you will be inserting the script into. When the page opens, it should look like this:
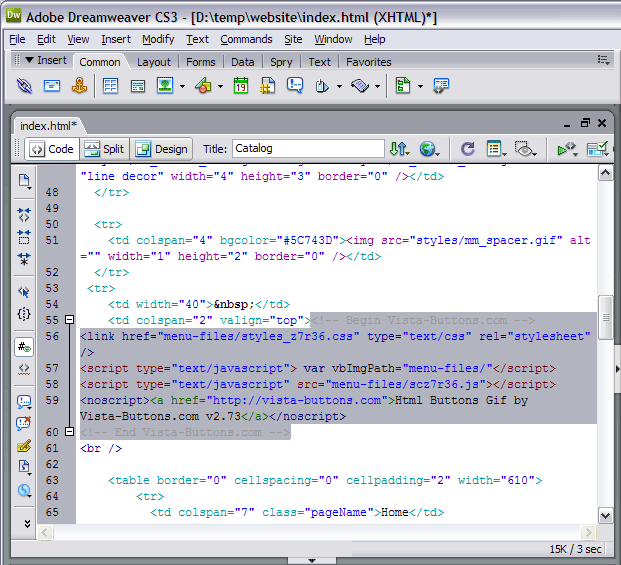
- Open the generated in Vista Buttons menu.htmlpage in any text editor. Copy all code within the following tags:
<!-- Begin Vista-Buttons.com -->
...
<!-- End Vista-Buttons.com -->

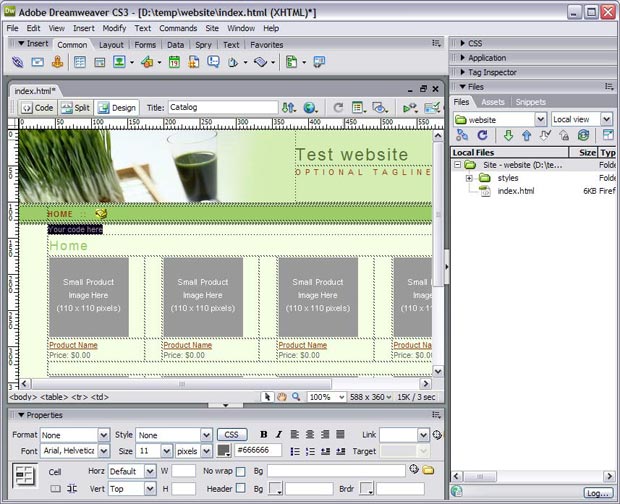
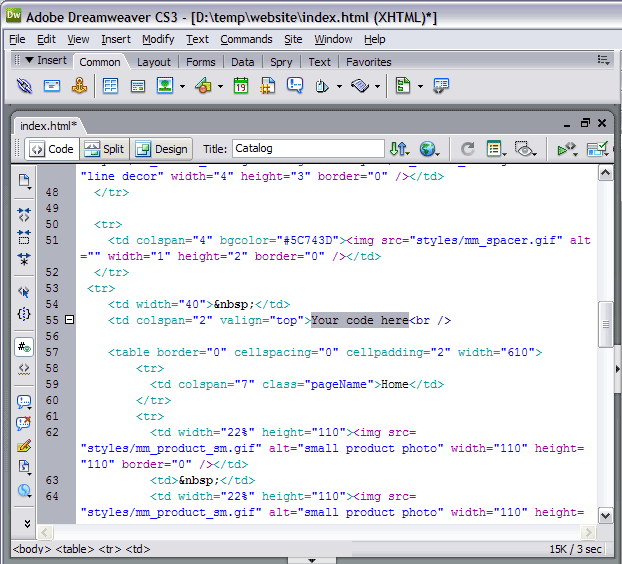
- Go back to Dreamweaver. In the Design mode decide where you would like the drop down menu to appear in your page. It helps you add the menu code in the correct place. Click in the spot you want the code to appear in and type the phrase: your code here
- We will now be inserting the JavaScript code into the body section right where we typed the phrase in the previous step. To do this, switch to HTML View.
- Go to the "Edit Menu" with Dreamweaver and select the "Paste" option to paste the menu code that we copied to the clipboard earlier. Since the phrase we typed was highlighted, it will be replaced when we paste the code in.
- Now you should copy the "menu-files" folder into the same folder with your index.html page.
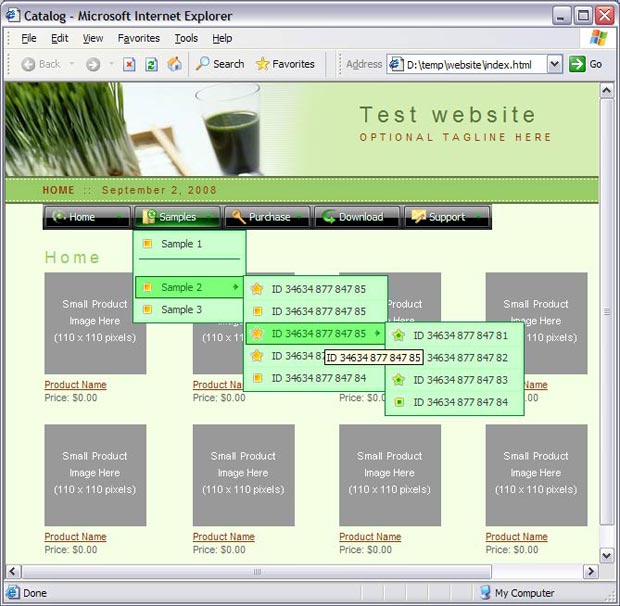
- Notice that in the Design mode your drop down menu won't display. It is normal. You should view your page in browser.
- That's all. You've added all necessary code to your page, so let's test it. Select "File/Preview in browser/IExplore" to display the page live (in Internet Explorer).
- If everything goes well, save your document and upload it and the "menu-files" folder to your web site. If something seems wrong, double-check that you followed all the steps correctly.
- If you still run into trouble, we'd be happy to assist you further. You can post your problem to us at  , and meanwhile describe your files in details.
(please include template name in the message title)