Features
High Quality and Professional Results You don't have to know HTML, JavaScript, CSS or any other coding languages to make multi-state rollover web buttons, professional cross-browser, search engine friendly DHTML menus. All you have to do is make some clicks and adjust buttons as you wish for them to appear. Vista Web Buttons will generate all necessary images, html, javascripts, css styles automatically!
Javascript Macintosh Style Dropdown Fonts, Borders and Background Colors Use any necessary font of any color, size and font decoration for normal and mouseover state. Create any available type, thickness and color of a menu's frame. Choose any color for backgrounds of submenus and items.
Dreamweaver Animation Menu Cost Effective Stop paying month-to-month subscription to web image and icon collections! Don't waste your money on licenses for every new domain where you want to place the menu! Pay once, use for life, anywhere!
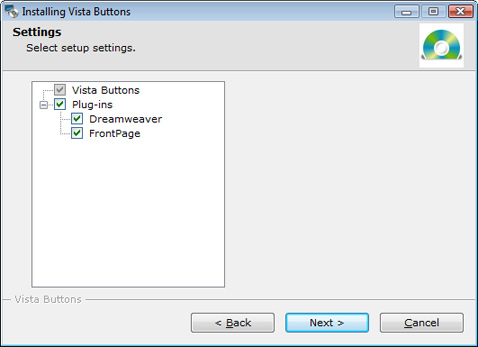
Simple Dynamic Drop Down Menu Dreamweaver Dreamweaver Html Button Multilanguage User Interface (MUI) Since the version 2.79 Dreamweaver Menu Extension supports the multilanguage user interface. Dreamweaver Menu Extension is translated into the numerous of languages such as: German, Dutch, French, Italian, Spanish, Portugues, Arabic, Polisch, Romanian, Hungarian, Bahasa Malaysia.
Text-based menu You can create a menu with text-based top items. Such menu will be loaded more quickly on your website (in comparison with image-based navigation).
Menu structure is comprised of HTML nested UL and LI tags. Standards compliant menu structure is simple to customize and update.
Create your own button themes Theme editor helps you create your own themes or modify existing ones.
2.0 Buttons by Web-Buttons.com v3.0.0 


 (please include template name in the message title)