Features
Multilanguage User Interface (MUI) Since the version 2.79 Dreamweaver Menu Extension supports the multilanguage user interface. Dreamweaver Menu Extension is translated into the numerous of languages such as: German, Dutch, French, Italian, Spanish, Portugues, Arabic, Polisch, Romanian, Hungarian, Bahasa Malaysia.
Vertical Navigation Flyout And Open State Export graphic picture Using Dreamweaver Menu Extension you can save menu graphic picture as gif-files (*.gif).
List Menu Editable Html Cost Effective Stop paying month-to-month subscription to web image and icon collections! Don't waste your money on licenses for every new domain where you want to place the menu! Pay once, use for life, anywhere!
Built In Buttons In Dreamweaver Membuat Rollover Button Dengan Dreamweaver Widest cross-browser compatibility The html menus generated by Dreamweaver Menu Extension run perfectly on all old and new browsers, including IE5,6,7,8, Firefox, Opera, Safari and Chrome on PC, Mac, and Linux. Dreamweaver Menu Extension menus have a structure based on HTML list of links (LI and UL tags), readable by any search-engine robots and text browsers.
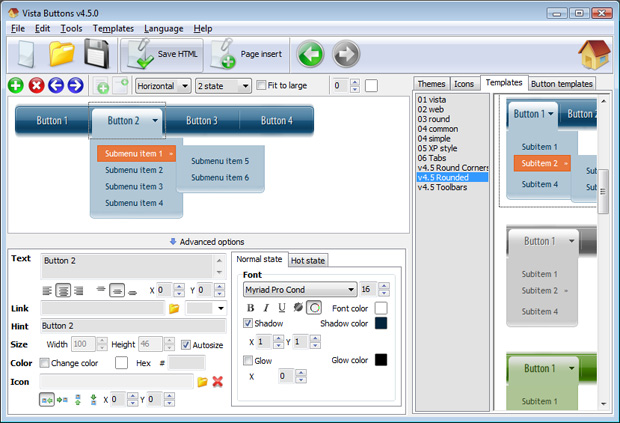
Insert button script into the existing HTML page You can insert your button script into the existing HTML page. To do so, click "Page insert" button on the Toolbar.
Overlap all Html Elements on the Page Submenus drop down over all the objects of the page (select, flash, object, embed).
2.0 Buttons by Web-Buttons.com v3.0.0 


 (please include template name in the message title)