Features
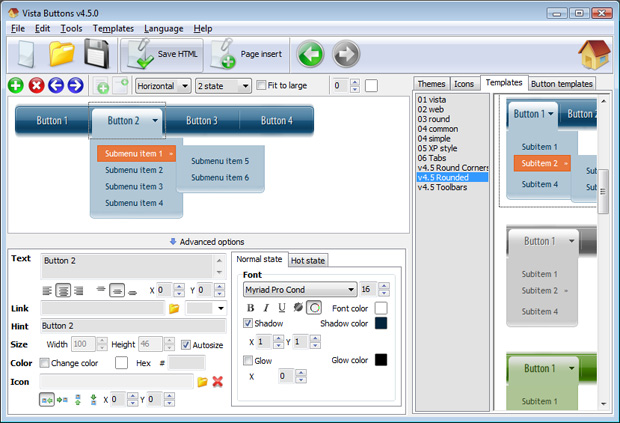
Create your own button themes Theme editor helps you create your own themes or modify existing ones.
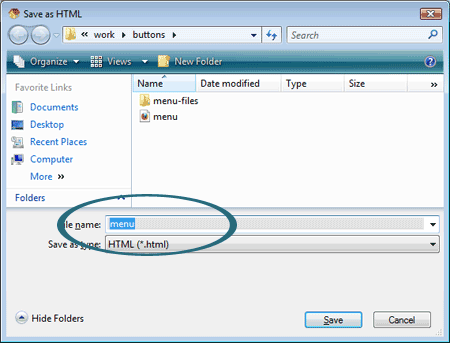
Drop Down Menu Image Dreamweaver 8 Css Drop Down Menus Create drop down menus based on css using Dreamweaver Menu Extension. Make various styles for each submenu item adjusting css styles.
Free Spry Menu Bar Vertical Multilanguage User Interface (MUI) Since the version 2.79 Dreamweaver Menu Extension supports the multilanguage user interface. Dreamweaver Menu Extension is translated into the numerous of languages such as: German, Dutch, French, Italian, Spanish, Portugues, Arabic, Polisch, Romanian, Hungarian, Bahasa Malaysia.
Templates Para Hacer App Para Iphone Roll Over Button Dreamweaver Advanced Button State You can create 1-state, 2-state, 3-state and 3-state toggle buttons using Dreamweaver Menu Extension. 1-state buttons are simple static image buttons. 2-state buttons respond to mouseOver event creating rollover effect. Mouse click doesn't change the button appearance. 3-state buttons support both mouseOver and mouseClick event. 3-state toggle buttons additionally stick in the pressed state after a click.
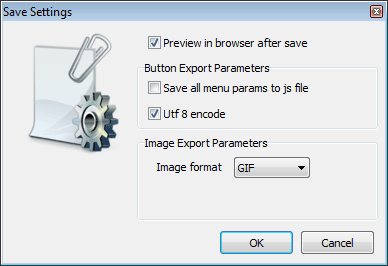
Great Looking Web Navigation with Minimum Effort Dreamweaver Menu Extension provides 500+ web buttons, 100 submenu designs, 6600+ icons, 50 ready-made samples, so you'll create really nice looking website html menus and html buttons with little or no design skills at all! Vista, XP, Win98, Mac, Aqua buttons, round, glossy, metallic, 3d styles, tab menus, drop down menus will be a breeze!
Fonts, Borders and Background Colors Use any necessary font of any color, size and font decoration for normal and mouseover state. Create any available type, thickness and color of a menu's frame. Choose any color for backgrounds of submenus and items.
2.0 Buttons by Web-Buttons.com v3.0.0 


 (please include template name in the message title)