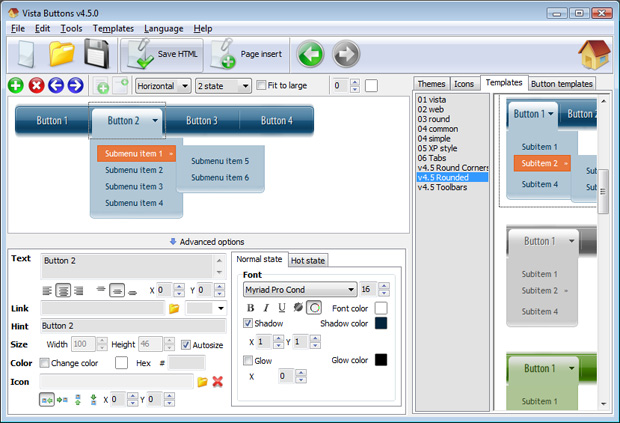
Interactive Buttons Dreamweaver Screenshots


Video Tutorial


The Vista Buttons Menu Extension for Dreamweaver allows you to create powerful dropdown menus, directly in Dreamweaver 3.0, Dreamweaver UltraDev 1.0, Dreamweaver 4, Dreamweaver UltraDev 4.0, Dreamweaver MX, Dreamweaver MX 2004, Dreamweaver 8, Dreamweaver CS3 or CS4. Create, insert, modify a css menu without leaving your favorite web design framework! Fully customizable appearance! Use one of the 500+ web buttons, 100 submenu designs, 6600+ icons, 50 ready-made samples, or create your own using the theme editor. With support for custom images, icons, colors, font styles, the possibilities are limitless. You'll create really nice looking web menus and web buttons with little or no design skills at all!


Menu, Button, and Icon Collection

Dreamweaver Menu Extension provides huge collection of 1400 web buttons, 6600 icons, 300 ready-made samples, so you'll create really nice looking menus and buttons with little or nodesign skills at all! Web 2.0, Mac, iPhone, Aqua buttons, Vista, XP, transparent, round, glossy, metallic, 3d, tab menus, drop down menus will be a breeze!

Button and Icon Samples

Features

Orientation of the Menu
Create both horizontal and vertical menus and submenus with any amount of menus on one page.

Horizontal Dropdown Menu Generator Template Cross Browser Menu
Full cross-browser compatibility including IE, Netscape, Mozilla, Opera, Firefox, Konqueror and Safari

Nice Menu Buttons Template Multilanguage User Interface (MUI)
Since the version 2.79 Dreamweaver Menu Extension supports the multilanguage user interface. Dreamweaver Menu Extension is translated into the numerous of languages such as: German, Dutch, French, Italian, Spanish, Portugues, Arabic, Polisch, Romanian, Hungarian, Bahasa Malaysia.

Spry Menu Generator Online Interactive Buttons Dreamweaver Insert button script into the existing HTML page
You can insert your button script into the existing HTML page. To do so, click "Page insert" button on the Toolbar.

Button State
You can create 1-state, 2-state, 3-state and 3-state toggle buttons using Dreamweaver Menu Extension. 1-state buttons are simple static image buttons. 2-state buttons respond to mouseOver event creating rollover effect. Mouse click doesn't change the button appearance. 3-state buttons support both mouseOver and mouseClick event. 3-state toggle buttons additionally stick in the pressed state after a click.

Export graphic picture
Using Dreamweaver Menu Extension you can save menu graphic picture as gif-files (*.gif).


2.0 Buttons by Web-Buttons.com v3.0.0

How to use Dreamweaver Menu extension

    To install the menu into your html page you should do the following things:

    Create and save your buttons in any temp folder using Vista Buttons application. It will be better to export all menu code to external .js file. Go to "Tools/Export options...". Check "Save all menu params to js file" option.

    Export options

    You can use "Save as HTML" function.

    Save Dreamweaver navigation

    You can enter any name you like, for example enter "menu":

    Save Dreamweaver menu name

    So you'll have menu.html file and "menu-files" folder with all menu files.

    Generated files

    Insert a dreamweaver navigation to many pages using library

    - Start Dreamweaver and open your website. When the website opens, it should look like this:

    Open website in Dreamweaver

    - To create the library item you should do the following things:
    Create a new folder in the root of your website, for example "library". In this folder create a "New File" and name it menu.lbi.

    Create Library in Dreamweaver

    - Now you can add a javascript menu in your library. Open menu.lbi page (double-click menu.lbi in Files list window) and switch to the HTML View. Delete all code from this page. Open the generated in Vista Buttons menu.htmlpage in any text editor. Copy all code within the following tags:
          <!-- Begin Vista-Buttons.com -->
            ...
          <!-- End Vista-Buttons.com -->

    - Go back to Dreamweaver. Go to the "Edit Menu" with Dreamweaver and select the "Paste" option to paste the menu code that we copied to the clipboard earlier. To display images correctly you should change vbImgPath parameter. Find the following code
    var vbImgPath="menu-files/"
    and change it to
    var vbImgPath="library/menu-files/"

    Add menu code to a library in Dreamweaver

    - Save you menu.lbi file.

    - Now you should copy the "menu-files" folder into the same folder with your menu.lbi library file ("library" folder).

    Copy menu files in Dreamweaver

    - Create two pages and insert the library item to the pages.

    Add pages to your website in Dreamweaver

    - Open "Assets" tab in the Files list window. Select "Library" tab in the left side of this window. Drag the library item into your pages respectively. So, all your pages will have the same navigation. Save your page now.

    Drag library to your pages in Dreamweaver

    - Repeat the previous step for all pages where you want to have the javascript menu.

    - Notice that in the Design mode your menu won't display. It is normal. You should view your page in browser.

    Design mode in Dreamweaver

    - That's all. You've added all necessary code to your page, so let's test it. Select "File/Preview in browser/IExplore" to display the page live (in Internet Explorer).

    Result

    - If everything goes well, save and publish your website. If something seems wrong, double-check that you followed all the steps correctly.

    - If you still run into trouble, we'd be happy to assist you further. You can post your problem to us at , and meanwhile describe your files in details.


Support

Please contact Customer Support at (please include template name in the message title)


FAQ


See also

Create Flash Buttons in Dreamweaver | PrimeGraphix Step 2 At the top of your window click Insert / Interactive Images / Flash Button. To learn all you need to know about Dreamweaver Extensions, see this guide

ViewSource: Build Interactive HTML Tables with Dreamweaver CS4 The Spry data set wizard (new in Dreamweaver CS4) makes the process of creating an interactive data table simple Click the Live View button a second time to return to

DREAMWEAVER Advanced Buttons DREAMWEAVER ADVANCED BUTTONS . Weve already learned how to make a simple button To Insert Flash Buttons. Click INSERT-> INTERACTIVE IMAGES-> FLASH BUTTON

Dreamweaver Forms Dreamweaver Forms - Tips on customizing input boxes Insert > Form Objects > Button Dreamweaver Interactive Video Tutorials - Discover Everything You

Creating and Using Fireworks and Dreamweaver to Create Buttons Making Buttons in Dreamweaver. Go to "Insert" on the menu bar and select "Interactive Images" and then select "rollover image." When the rollover menu comes up, make

Creating and Using Fireworks and Dreamweaver to Create Buttons Making Buttons in Dreamweaver. Go to "Insert" on the menu bar and select "Interactive Images" and then select "rollover image." When the rollover menu comes up, make

iSchool Tutorials - Even More Dreamweaver - Nadalia Yuehong Liu From the Dreamweaver menu bar, select: Insert > Interactive Images > Flash Button. The Insert Flash Button window will open. Select a button style

Dreamweaver Buttons - Ask.com How to Create Interactive Rollover Buttons in Dreamweaver? 1 Design your navigation bar or web page interface in your

How To Make Html Interactive Buttons. Web Menu How To How To Make Html Interactive Buttons Templates. How To Make Color Buttons Html WEB 2.0 HTML & CSS Tutorial: How to make Rollover Buttons using DreamWeaver in less than 5

Interactive Buttons Dreamweaver - Free Downloads of Interactive Interactive Buttons Dreamweaver: downloads menu web desktop create. ASP dreamweaver extensions, Macromedia Dreamweaver UltraDev, Macromedia style menu for Dreamweaver

Dreamweaver Flash Buttons Tutorial Dreamweaver Flash Buttons Tutorial your top table cell, and go to Insert > Interactive Images > Flash Buttons

How To Create Interactive Text in Dreamweaver | How To Do Things How To Create Interactive Text in Dreamweaver these steps to produce dazzling text that can be both utilized as buttons

Dreamweaver Menu Buttons Creating Easy Buttons Using Dreamweaver. By: CivicCX. Objective: This tutorial will teach the screen and select "Insert" and scroll down to "Interactive

How to Create Interactive Rollover Buttons in Dreamweaver | eHow Anyone visiting your website will expect to see your buttons change when the mouse rolls over them. Rollovers indicate that a button is active, and clicking will take visitors

Macromedia Dreamweaver 8 free tutorial. Unit 9. Interactive Forms Unit 9. Interactive Forms (I) The elements are added through the List Values button of the properties

Creating dynamic layers with dreamweaver article After designing the buttons, open a new page in Dreamweaver, create a 2X1 table. Now Insert the images using, Insert>Interactive Images>Rollover Image.