Features
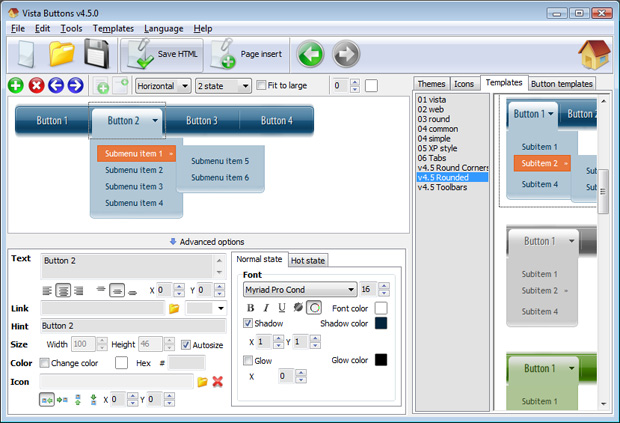
Create your own button themes Theme editor helps you create your own themes or modify existing ones.
Menu Css Desplegable Dreamweavermx Great Looking Web Navigation with Minimum Effort Dreamweaver Menu Extension provides 500+ web buttons, 100 submenu designs, 6600+ icons, 50 ready-made samples, so you'll create really nice looking website html menus and html buttons with little or no design skills at all! Vista, XP, Win98, Mac, Aqua buttons, round, glossy, metallic, 3d styles, tab menus, drop down menus will be a breeze!
Fireworks Free Menu Bar Templates Fonts, Borders and Background Colors Use any necessary font of any color, size and font decoration for normal and mouseover state. Create any available type, thickness and color of a menu's frame. Choose any color for backgrounds of submenus and items.
Plantilla Para Joomla Con Menu Desplegable Dreamweaver Switch Design Style Search Engine Friendly Dreamweaver Menu Extension generates html code which is transparent to search spiders.
Widest cross-browser compatibility The html menus generated by Dreamweaver Menu Extension run perfectly on all old and new browsers, including IE5,6,7,8, Firefox, Opera, Safari and Chrome on PC, Mac, and Linux. Dreamweaver Menu Extension menus have a structure based on HTML list of links (LI and UL tags), readable by any search-engine robots and text browsers.
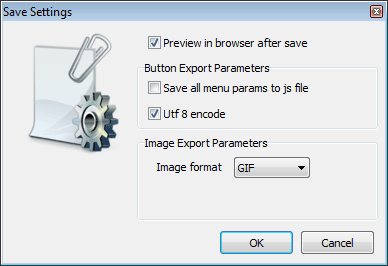
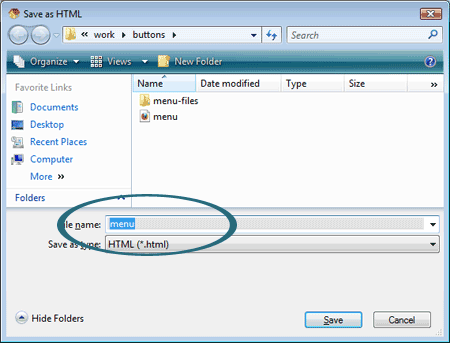
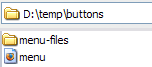
Save project. Save your image buttons as html You can save current project in the project file (*.xwb) or into the HTML file (*.html).
2.0 Buttons by Web-Buttons.com v3.0.0 


 (please include template name in the message title)